虚拟网络计算( Virtual Network Computing ),或称作VNC,是一种图形桌面共享系统,允许您从一台计算机远程控制另一台计算机。VNC服务器传输键盘和鼠标事件,并通过网络连接显示远程主机的屏幕,从而允许您在Linode服务器上运行完整的桌面环境。

本指南将介绍如何在运行Ubuntu 16.04的服务器上安装图形桌面环境,以及如何使用VNC从本地计算机连接至该桌面。
开始前的准备
sudo apt-get update && sudo apt-get upgrade
注意
本指南是为非root用户编写的,会在需要提升权限的命令之前加上
sudo。如果您不熟悉sudo命令,请参阅Linux用户和用户组指南。
在Linode上安装桌面与VNC服务器
1.Ubuntu的软件库中有多个可用的桌面环境。以下命令将会安装Ubuntu系统的默认桌面Unity,以及图形界面正常工作所需的依赖项:
sudo apt-get install ubuntu-desktop gnome-panel gnome-settings-daemon metacity nautilus gnome-terminal
注意
这将安装完整的Ubuntu桌面环境,包括办公软件和Web浏览器等工具。要只安装桌面而不安装这些软件包的话,请运行以下命令:
sudo apt-get install --no-install-recommends ubuntu-desktop gnome-panel gnome-settings-daemon metacity nautilus gnome-terminal
在安装过程中,系统会询问您是否将系统文件更新为新版本:
Configuration file '/etc/init/tty1.conf'
 ==> File on system created by you or by a script.
 ==> File also in package provided by package maintainer.
   What would you like to do about it ?  Your options are:
    Y or I  : install the package maintainer's version
    N or O  : keep your currently-installed version
      D     : show the differences between the versions
      Z     : start a shell to examine the situation
 The default action is to keep your current version.
*** tty1.conf (Y/I/N/O/D/Z) [default=N] ?
输入 y 或 回车 确认更新。
2.安装VNC服务器:
sudo apt-get install vnc4server
保护VNC连接安全
VNC服务器生成 display (图形输出)编号,该编号在服务器启动时定义。如果未定义display编号,服务器将使用最小的可用编号。VNC连接使用的端口号是5900 + display。本指南将使用1作为display编号;因此,您将连接至远程的5901端口来使用VNC。
默认的VNC连接是非加密的。为了保护您密码和数据的安全,您需要借助SSH隧道将流量传输至本地端口。可以使用相同的本地端口来保持一致性。
Mac OS X和Linux
1.在您的桌面环境下,通过以下命令连接至Linode。请务必将user@example.com替换为您的用户名、Linode主机名或IP地址:
ssh -L 5901:127.0.0.1:5901 user@example.com
2.在您的Linode上启动VNC服务器并测试连接。系统将提示您设置密码:
vncserver :1
3.根据从您的桌面连接至VNC章节的步骤初始化连接。
Windows
1.打开PuTTY并导航至菜单中SSH下的Tunnels。按照下图所示新建一个转发端口,并将example.com替换为您Linode的IP地址或主机名:
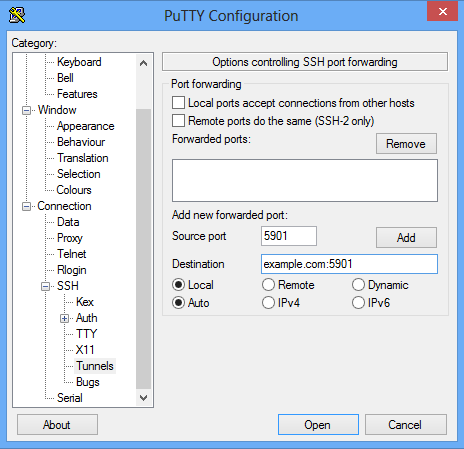
2.点击 Add,之后返回Session(会话)界面。输入您Linode的主机名或IP地址,以及会话的标题。点击 Save 保存设置以供将来使用,之后点击 Open 初始化SSH隧道。
3.启动VNC服务器并测试连接。系统将提示您设置密码:
vncserver :1
4.根据从您的桌面连接至VNC章节的步骤初始化连接。
从您的桌面连接至VNC
在本章节中,您将使用VNC客户端或 查看器 连接至远程服务器。查看器是绘制VNC服务器生成的图形界面并在本地计算机输出显示的软件。
Mac OS X和Windows
在OS X和Windows上有很多查看器的选择,本指南将使用RealVNC Viewer。
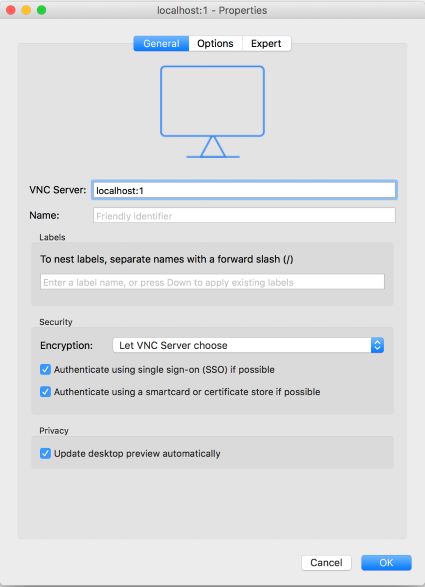
1.安装并打开VNC Viewer后,通过VNC客户端连接至本地主机。VNC服务器地址格式为localhost:#,其中#代表我们在保护VNC连接安全章节中使用的display编号:
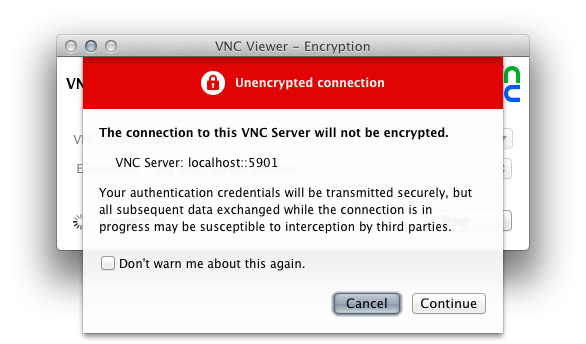
2.系统会警告您连接未加密,但如果您已按照上述步骤确保了VNC连接的安全,则会话将安全的通过SSH隧道连接至您的Linode。点击 Continue 以继续:
3.系统将提示您输入首次启动VNC服务器时设定的密码。如果您尚未在Linode上启动VNC服务器,请参阅保护VNC连接安全章节。
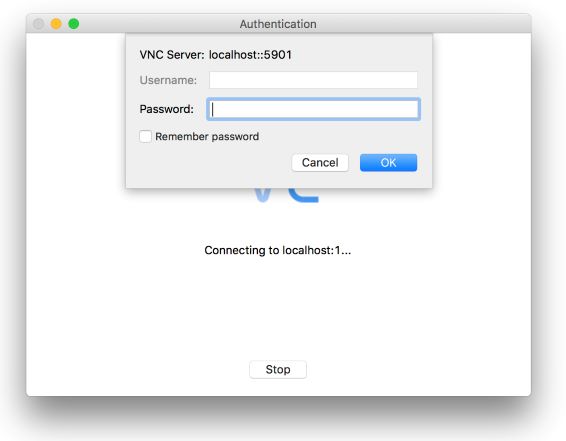
连接后,您将看到一个空白的灰色屏幕,这是因为服务器的桌面进程尚未启动。在下一章节,我们将配置您的Linode以启动完整的桌面环境。
Linux
Ubuntu桌面环境下有多款可用的VNC客户端。您可以在这里找到可供Ubuntu使用的VNC客户端列表。本指南将使用Ubuntu默认安装的Remmina。
1.打开Remmina。
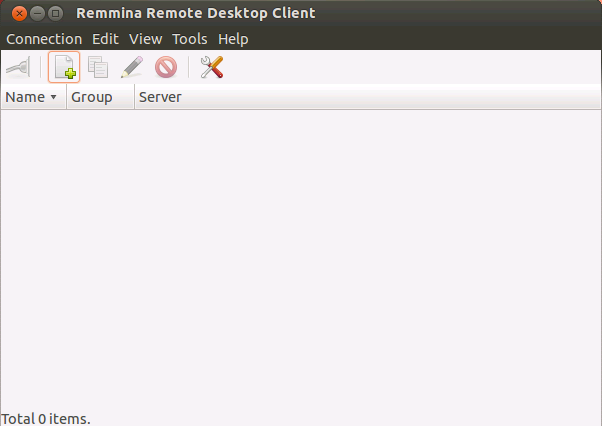
2.点击Create a new remote desktop profile按钮,新建一个远程桌面配置文件。为您的配置文件命名,指定VNC协议,并在服务器字段中输入localhost:1。服务器字段中的:1和display编号相对应。在密码设置中填写您在保护VNC连接安全章节中设定的密码:
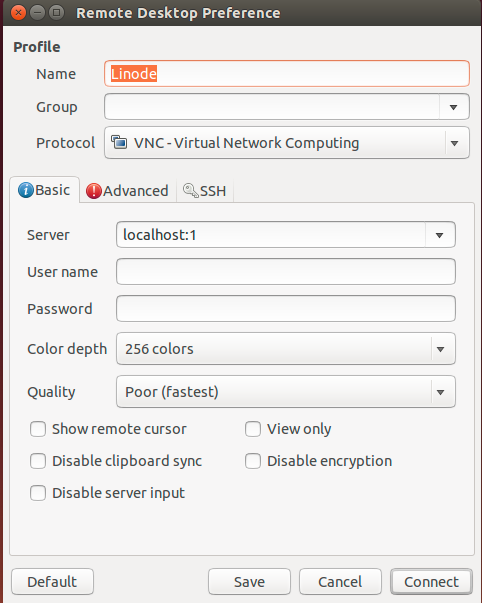
3.点击 Connect。
连接后,您将看到一个空白的灰色屏幕,这是因为服务器的桌面进程尚未启动。在下一章节,我们将配置您的Linode以启动完整的桌面环境。
配置VNC以启动完整桌面环境
本章节将配置VNC,使其在启动时启动完整的Unity桌面。
1.成功连接之后,再退出该连接。关闭VNC服务器:
vncserver -kill :1
2.根据以下配置编辑~/.vnc/xstartup文件的末尾部分。这将在启动VNC服务器时以后台进程的方式启动桌面依赖项:
#!/bin/sh

# 在常规模式下运行桌面时请取消掉以下两行的注释:
# unset SESSION_MANAGER
# exec /etc/X11/xinit/xinitrc

[ -x /etc/vnc/xstartup ] && exec /etc/vnc/xstartup
[ -r $HOME/.Xresources ] && xrdb $HOME/.Xresources
xsetroot -solid grey
vncconfig -iconic &
x-terminal-emulator -geometry 80x24+10+10 -ls -title "$VNCDESKTOP Desktop" &
x-window-manager &

gnome-panel &
gnome-settings-daemon &
metacity &
nautilus &
3.保存并退出文件。重新启动VNC会话:
vncserver :1
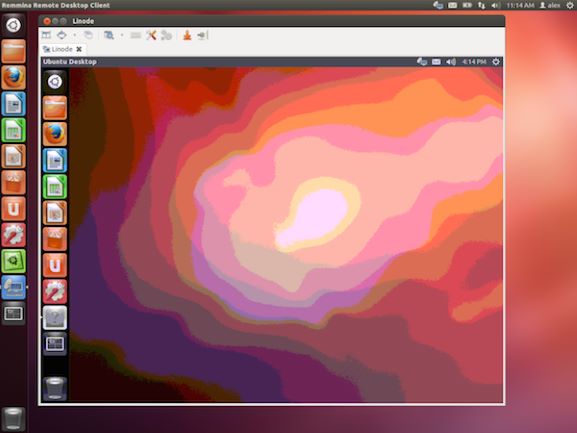
4.按照之前章节的相同步骤从您本地的VNC客户端连接至VNC服务器。现在您应该可以看见完整的Ubuntu桌面:
开机启动VNC服务器
此部分是可选操作。请按以下步骤配置VNC服务器,使其在系统重启后可以自动启动。
1.启动您的crontab。如果您之前从未编辑过crontab配置文件,系统会提示您从可用的文本编辑器中选择一个对该文件进行编辑:
crontab -e
no crontab for user - using an empty one

Select an editor.  To change later, run 'select-editor'.
  1. /bin/ed
  2. /bin/nano
  3. /usr/bin/vim.basic
  4. /usr/bin/vim.tiny

Choose 1-4 [2]:
2.在文件的最后添加@reboot /usr/bin/vncserver :1。您的crontab配置文件应该与以下内容类似:
# Edit this file to introduce tasks to be run by cron.
#
# Each task to run has to be defined through a single line
# indicating with different fields when the task will be run
# and what command to run for the task
#
# To define the time you can provide concrete values for
# minute (m), hour (h), day of month (dom), month (mon),
# and day of week (dow) or use '*' in these fields (for 'any').
#
# Notice that tasks will be started based on the cron's system
# daemon's notion of time and timezones.
#
# Output of the crontab jobs (including errors) is sent through
# email to the user the crontab file belongs to (unless redirected).
#
# For example, you can run a backup of all your user accounts
# at 5 a.m every week with:
# 0 5 * * 1 tar -zcf /var/backups/home.tgz /home/
#
# For more information see the manual pages of crontab(5) and cron(8)
#
# m h dom mon dow command

@reboot /usr/bin/vncserver :1
3.保存并退出文件。您可以通过重启Linode服务器并连接VNC服务器来验证上述配置是否生效。
参考文章
