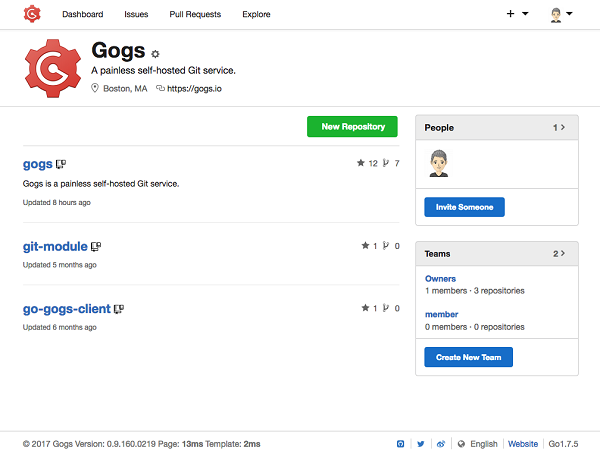
Gogs:一款极易搭建的自助 Git 服务, by
Unknwon@Github
本文基于
Gogs 0.11.91.0811
1. 环境要求
- 数据库:支持 MySQL
>=5.7(InnoDB 引擎)、PostgreSQL、MSSQL、TiDB - Git:客户端和服务端均需版本
>=1.8.3 - SSH 服务器:
- 如果选择在 Windows 系统使用内置的 SSH 服务器,请确保添加
ssh-keygen到%PATH%环境变量中 - Windows 系统推荐使用 Cygwin OpenSSH 或 Copssh
- Windows 系统请确保
Bash是默认的 Shell 程序,而不是PowerShell
- 如果选择在 Windows 系统使用内置的 SSH 服务器,请确保添加
2. 新建用户
Gogs 默认以git用户运行,首先以root身份新建用户git并为其设置密码:
> sudo adduser git
> sudo passwd git
之后切换至git用户,在/home/git/目录下创建.ssh目录:
> su git # 切换至 git 用户
> cd /home/git/
/home/git > mkdir .ssh # 创建 .ssh 目录
/home/git > ls -al
drwx------  6 git  git  154 Nov  1 22:58 .
drwxr-xr-x. 6 root root  58 Nov  1 18:35 ..
-rw-------  1 git  git  146 Nov  1 22:50 .bash_history
-rw-r--r--  1 git  git   18 Apr 11  2018 .bash_logout
-rw-r--r--  1 git  git  193 Apr 11  2018 .bash_profile
-rw-r--r--  1 git  git  231 Apr 11  2018 .bashrc
drwxrwxr-x  3 git  git   18 Nov  1 18:36 .cache
drwxrwxr-x  3 git  git   18 Nov  1 18:36 .config
drwxr-xr-x  4 git  git   39 Nov 13  2018 .mozilla
drwxrwxr-x  2 git  git    6 Nov  1 22:58 .ssh
-rw-r--r--  1 git  git  658 Oct 31  2018 .zshrc
注:之后的操作全部以
git用户进行操作
3. 二进制安装
Gogs 支持二进制、源码、包管理、Docker、Vagrant、基于 K8s 的 Helm Charts 等多种安装方式
从 Gogs 的Releases页面下载linux_amd64zip,之后解压:
/home/git > wget https://github.com/gogs/gogs/releases/download/v0.11.91/linux_amd64.zip
/home/git > unzip linux_amd64.zip
/home/git > cd gogs

/home/git/gogs > ls -hl
total 55M
-rwxr-xr-x  1 git git  55M Aug 12 10:26 gogs
-rw-r--r--  1 git git 1.1K Jun  5  2018 LICENSE
drwxr-xr-x  8 git git  101 Aug 12 10:26 public
-rw-r--r--  1 git git 8.4K Aug 12 10:25 README.md
-rw-r--r--  1 git git 5.5K Aug 12 10:25 README_ZH.md
drwxr-xr-x  7 git git  195 Aug 12 10:26 scripts
drwxr-xr-x 11 git git  174 Aug 12 10:26 templates

/home/git/gogs > pwd
/home/git/gogs
4. 自定义配置文件
Gogs 的默认配置文件位于源码中的
conf/app.ini,该文件从v0.6.0版本开始被嵌入到二进制中
为了使自定义配置能覆盖原有的默认配置,需要在gogs目录下手动创建自定义配置文件custom/conf/app.ini,在该文件中修改相应选项的值即可:
/home/git/gogs > mkdir -p custom/conf
/home/git/gogs > vim custom/conf/app.ini
参见官方文档:
例如自定义仓库根目录、数据库配置:
[repository]
ROOT = /home/gogs-repos

[database]
USER = admin
PASSWD = ******
这样可以保护自定义配置不被破坏:
- 从二进制安装的用户,可以直接替换二进制及其它文件而不至于重新编写自定义配置
- 从源码安装的用户,可以避免由于版本管理系统导致的文件修改冲突
5. 创建数据库及用户
首先建立好数据库gogs,文件scripts/mysql.sql是数据库的初始化 SQL 语句:
SET GLOBAL innodb_file_per_table = ON,
           innodb_file_format = Barracuda,
           innodb_large_prefix = ON;
DROP DATABASE IF EXISTS gogs;
CREATE DATABASE IF NOT EXISTS gogs CHARACTER SET utf8mb4 COLLATE utf8mb4_general_ci;
执行下列命令即可初始化gogs数据库:
mysql -u root -p < scripts/mysql.sql
此外还需要登录 MySQL 创建新用户gogs,并将数据库gogs的所有权限都赋予该用户:
mysql> CREATE USER 'gogs'@'localhost' identified by 'YOUR_PASSWORD';
mysql> GRANT ALL PRIVILEGES ON gogs.* to 'gogs'@'localhost';
mysql> FLUSH PRIVILEGES;
如需更新密码:
mysql> ALTER USER 'gogs'@'localhost' identified by 'NEW_PASSWORD';
6. 运行 Gogs
./gogs web前台运行:
/home/gogs > ./gogs web
2019/11/01 17:48:31 [TRACE] Custom path: /home/gogs/custom
2019/11/01 17:48:31 [TRACE] Log path: /home/gogs/log
2019/11/01 17:48:31 [TRACE] Log Mode: Console (Trace)
2019/11/01 17:48:31 [ INFO] Gogs 0.11.91.0811
2019/11/01 17:48:31 [ INFO] Cache Service Enabled
2019/11/01 17:48:31 [ INFO] Session Service Enabled
2019/11/01 17:48:31 [ INFO] SQLite3 Supported
2019/11/01 17:48:31 [ INFO] Run Mode: Development
2019/11/01 17:48:31 [ INFO] Listen: http://0.0.0.0:3000
...
或者nohup ./gogs web > gogs.out 2>&1 &后台运行:
# 后台运行 gogs,stderr 重定向至 stdout,stdout 重定向至 gogs.out
/home/gogs $ nohup ./gogs web > gogs.out 2>&1 &
[1] 8346

/home/gogs $ jobs -l # 查看后台任务
[1]  + 8346 running    nohup ./gogs web > gogs.out 2>&1

/home/gogs $ cat gogs.out # 查看 gogs 在 gogs.out 中的输出
nohup: ignoring input
2019/11/01 18:01:33 [TRACE] Custom path: /home/gogs/custom
2019/11/01 18:01:33 [TRACE] Log path: /home/gogs/log
2019/11/01 18:01:33 [TRACE] Log Mode: Console (Trace)
2019/11/01 18:01:33 [ INFO] Gogs 0.11.91.0811
2019/11/01 18:01:33 [ INFO] Cache Service Enabled
2019/11/01 18:01:33 [ INFO] Session Service Enabled
2019/11/01 18:01:33 [ INFO] SQLite3 Supported
2019/11/01 18:01:33 [ INFO] Run Mode: Development
2019/11/01 18:01:33 [ INFO] Listen: http://0.0.0.0:3000

/home/gogs $ fg %1 # 切至前台运行
[1]  + 8346 running    nohup ./gogs web > gogs.out 2>&1
^Z                 # 暂停并放入后台
[1]  + 8346 suspended  nohup ./gogs web > gogs.out 2>&1

/home/gogs $ jobs -l
[1]  + 8346 suspended  nohup ./gogs web > gogs.out 2>&1

/home/gogs $ bg %1 # 后台继续运行
[1]  + 8346 continued  nohup ./gogs web > gogs.out 2>&1

/home/gogs $ jobs -l
[1]  + 8346 running    nohup ./gogs web > gogs.out 2>&1
参见:
最后访问http://localhost:3000/install,即可根据提示进行安装配置:
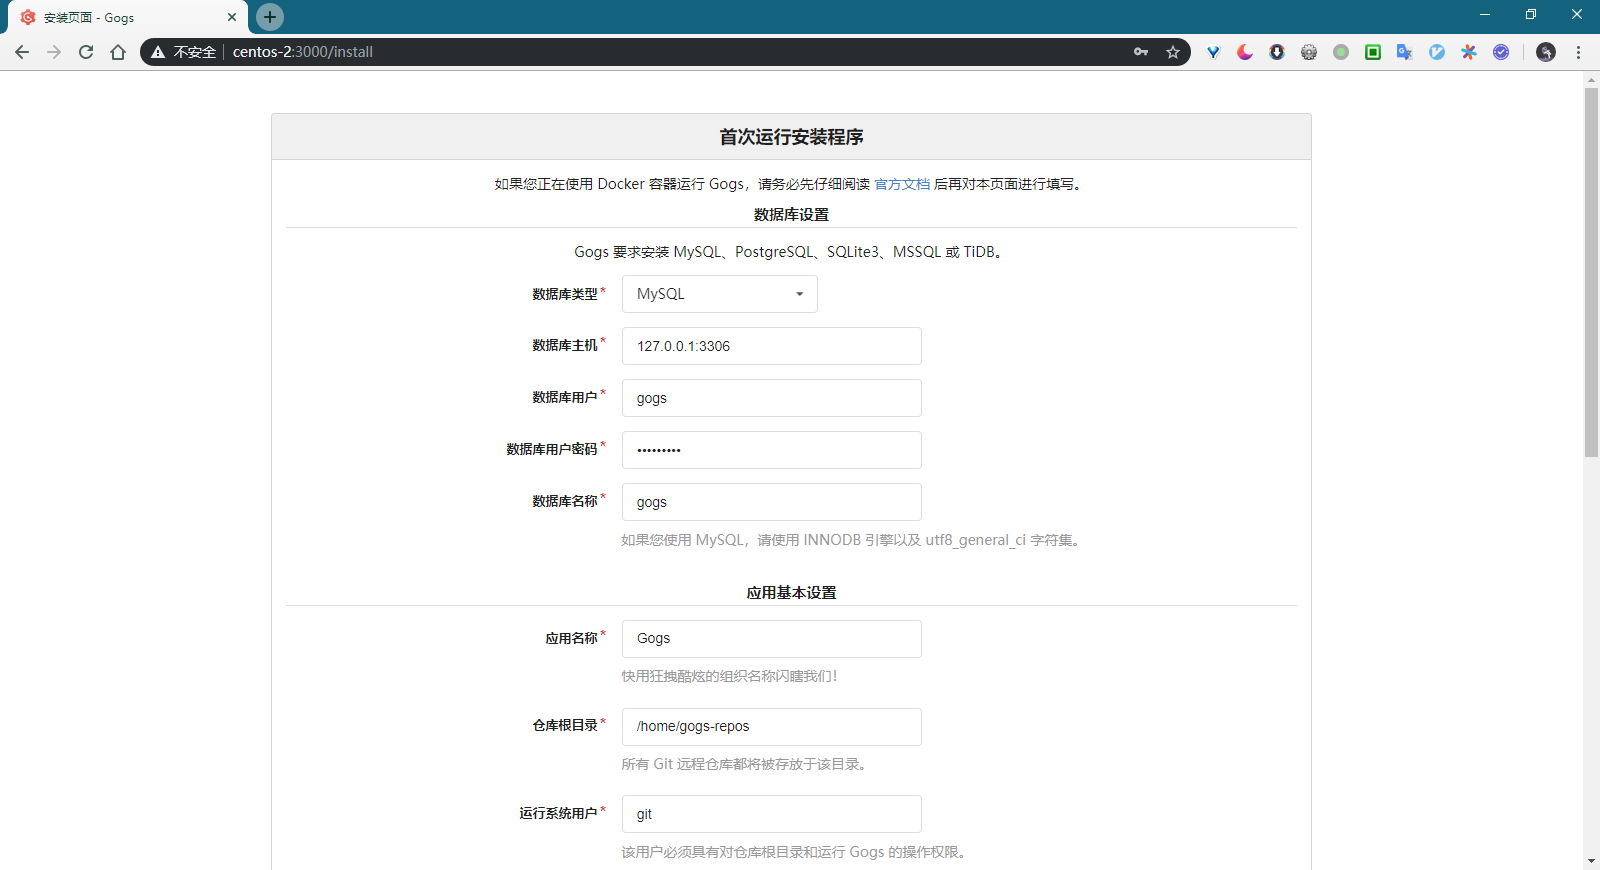
// TODO: To be updated…

