Apache Guacamole是一款HTML5应用程序,可通过RDP,VNC和其他协议访问远程桌面。您可以创建一个虚拟云桌面,用户通过Web浏览器即可访问。本指南将介绍如何通过Docker安装Apache Guacamole,并借助其访问托管在Linode上的远程桌面。
安装Docker
这里介绍的方法将安装最新版本的Docker。如需安装特定版本Docker,或需要Docker EE环境,请参阅官方文档寻求帮助。
以下步骤将使用Ubuntu官方软件库安装Docker社区版(Community Edition,CE)。如需在其他Linux发行版上安装,请参阅官网的安装说明。
1.卸载系统上可能存在的旧版本Docker:
sudo apt remove docker docker-engine docker.io
2.确保您已安装了使用Docker仓库所需的如下依赖:
sudo apt install apt-transport-https ca-certificates curl software-properties-common
3.添加Docker的GPG密钥:
curl -fsSL https://download.docker.com/linux/ubuntu/gpg | sudo apt-key add -
4.验证GPG密钥指纹:
sudo apt-key fingerprint 0EBFCD88
您应该看到类似以下内容的输出:
pub   4096R/0EBFCD88 2017-02-22
      Key fingerprint = 9DC8 5822 9FC7 DD38 854A  E2D8 8D81 803C 0EBF CD88
uid                  Docker Release (CE deb) <docker@docker.com>
sub   4096R/F273FCD8 2017-02-22
5.添加Dockerstable仓库:
sudo add-apt-repository "deb [arch=amd64] https://download.docker.com/linux/ubuntu $(lsb_release -cs) stable"
6.更新软件包索引并安装Docker社区版:
sudo apt update
sudo apt install docker-ce
7.将受限的Linux用户账户添加到docker用户组:
sudo usermod -aG docker exampleuser
您需要重启Shell会话才能使此更改生效。
8.运行内置的“Hello World”程序以检查Docker是否成功安装:
docker run hello-world
使用MySQL初始化Guacamole身份验证
本指南将使用MySQL作为参考,但PostgreSQL以及MariaDB也同样适用。
1.拉取Guacamole服务器、Guacamole客户端和MySQL的Docker镜像:
docker pull guacamole/guacamole
docker pull guacamole/guacd
docker pull mysql/mysql-server
2.创建数据库初始化脚本以创建用于验证身份的数据表:
docker run --rm guacamole/guacamole /opt/guacamole/bin/initdb.sh --mysql > initdb.sql
3.为MySQL的root用户生成一次性密码,可在日志中查看:
docker run --name example-mysql -e MYSQL_RANDOM_ROOT_PASSWORD=yes -e MYSQL_ONETIME_PASSWORD=yes -d mysql/mysql-server
docker logs example-mysql
Docker日志会在终端中打印密码:
[Entrypoint] Database initialized
[Entrypoint] GENERATED ROOT PASSWORD: <password>
4.重命名并将initdb.sql移动到MySQL容器中:
docker cp initdb.sql example-mysql:/guac_db.sql
5.在MySQL的Docker容器中打开bash终端:
docker exec -it example-mysql bash
6.使用一次性密码登录。在重新设定root用户密码之前,终端不会接受任何命令。创建一个新的数据库和用户,如下所示:
bash-4.2# mysql -u root -p
Enter password:
Welcome to the MySQL monitor.  Commands end with ; or \g.
Your MySQL connection id is 11
Server version: 5.7.20

Copyright (c) 2000, 2017, Oracle and/or its affiliates. All rights reserved.

Oracle is a registered trademark of Oracle Corporation and/or its
affiliates. Other names may be trademarks of their respective
owners.

Type 'help;' or '\h' for help. Type '\c' to clear the current input statement.

mysql> ALTER USER 'root'@'localhost' IDENTIFIED BY 'new_root_password';
Query OK, 0 rows affected (0.00 sec)

mysql> CREATE DATABASE guacamole_db;
Query OK, 1 row affected (0.00 sec)

mysql> CREATE USER 'guacamole_user'@'%' IDENTIFIED BY 'guacamole_user_password';
Query OK, 0 rows affected (0.00 sec)

mysql> GRANT SELECT,INSERT,UPDATE,DELETE ON guacamole_db.* TO 'guacamole_user'@'%';
Query OK, 0 rows affected (0.00 sec)

mysql> FLUSH PRIVILEGES;
Query OK, 0 rows affected (0.00 sec)

mysql> quit
Bye
7.在bash终端中,使用初始化脚本为新数据库创建数据表:
cat guac_db.sql | mysql -u root -p guacamole_db
验证数据表是否已成功添加。如果guacamole数据库中不存在新建的表,请再次确认之前的步骤均已正确执行。
mysql> USE guacamole_db;
Reading table information for completion of table and column names
You can turn off this feature to get a quicker startup with -A

Database changed
mysql> SHOW TABLES;
+---------------------------------------+
| Tables_in_guacamole_db                |
+---------------------------------------+
| guacamole_connection                  |
| guacamole_connection_group            |
| guacamole_connection_group_permission |
| guacamole_connection_history          |
| guacamole_connection_parameter        |
| guacamole_connection_permission       |
| guacamole_sharing_profile             |
| guacamole_sharing_profile_parameter   |
| guacamole_sharing_profile_permission  |
| guacamole_system_permission           |
| guacamole_user                        |
| guacamole_user_password_history       |
| guacamole_user_permission             |
+---------------------------------------+
13 rows in set (0.00 sec)
退出bash终端:
exit
在浏览器中访问Guacamole
1.在Docker中启动guacd:
docker run --name example-guacd -d guacamole/guacd
2.连接容器,以便Guacamole验证存储在MySQL数据库中的凭证:
docker run --name example-guacamole --link example-guacd:guacd --link example-mysql:mysql -e MYSQL_DATABASE='guacamole_db' -e MYSQL_USER='guacamole_user' -e MYSQL_PASSWORD='guacamole_user_password' -d -p 127.0.0.1:8080:8080 guacamole/guacamole
注意
可通过以下命令查看所有正在运行和未运行的Docker容器:
docker ps -a
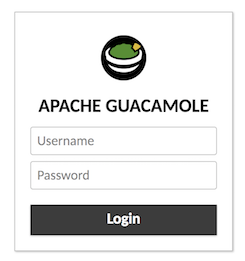
3.example-guacamole、example-guacd和example-mysql都已运行后,请在浏览器中访问localhost:8080/guacamole/。默认的登录账户是guacadmin,默认登录密码guacadmin。登录后应尽快修改登录账户及密码。
在Linode上搭建VNC服务器
在共享远程桌面之前,必须在Linode上安装桌面环境以及VNC服务器。本指南将使用Xfce桌面,因为Xfce是轻量级的,不会过度消耗系统资源。
1.在Linode上安装Xfce:
sudo apt install xfce4 xfce4-goodies
如果系统资源的限制较少,则可使用Unity桌面作为替代:
sudo apt install --no-install-recommends ubuntu-desktop gnome-panel gnome-settings-daemon metacity nautilus gnome-terminal
2.安装VNC服务器。启动VNC服务器时,系统将提示用户输入密码:
sudo apt install tightvncserver
vncserver
除了提示输入密码外,系统还会提供“仅可查看”的选项。密码最大长度为8位字符。对于需要更高安全性的设置,我们强烈建议您将Guacamole部署为使用SSL加密的反向代理。
You will require a password to access your desktops.

Password:
Verify:
Would you like to enter a view-only password (y/n)?
3.确保在.vnc/xstartup的最后启动桌面环境,否则只会显示灰色屏幕:
echo 'startxfce4 &' | tee -a .vnc/xstartup
若使用Unity桌面作为替代,则配置示例如下:
#!/bin/sh

xrdb $HOME/.Xresources
xsetroot -solid grey
#x-terminal-emulator -geometry 80x24+10+10 -ls -title "$VNCDESKTOP Desktop" &
#x-window-manager &
# Fix to make GNOME work
export XKL_XMODMAP_DISABLE=1
/etc/X11/Xsession

gnome-panel &
gnome-settings-daemon &
metacity &
nautilus &
在Guacamole中新建连接
Guacamole支持VNC,RDP,SSH和Telnet协议。本章节将介绍如何在浏览器界面中添加新的连接。
1.在连接到VNC服务器之前,创建一个SSH隧道,并将user和example.com替换为Linode的用户名和公网IP:
ssh -L 5901:localhost:5901 -N -f -l user example.com
2.在Guacamole控制面板中,点击右上角的下拉菜单,然后选择 Settings 。在 Connections 选项卡中,点击 New Connection 按钮。

3.在 Edit Connection 设置中,输入连接名。在 Parameters 设置中,主机名即为Linode的公网IP地址。端口号为5900 + 显示编号——这里以5901为例。最后输入8位密码。
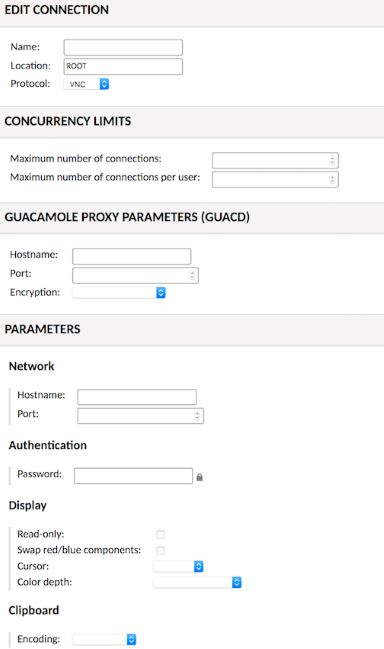
官方文档详细描述了所有参数的具体含义。
注意
如果您在同一Linode服务器上有多个VNC连接,请增加连接所用的端口号:5902,5903……以此类推。如果您的远程连接托管在不同的Linode服务器上,则仍应继续使用5901端口。
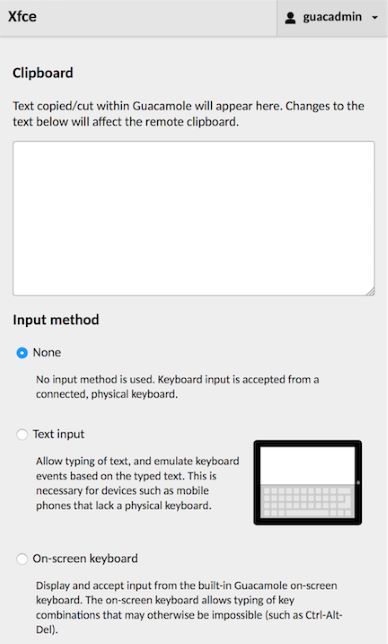
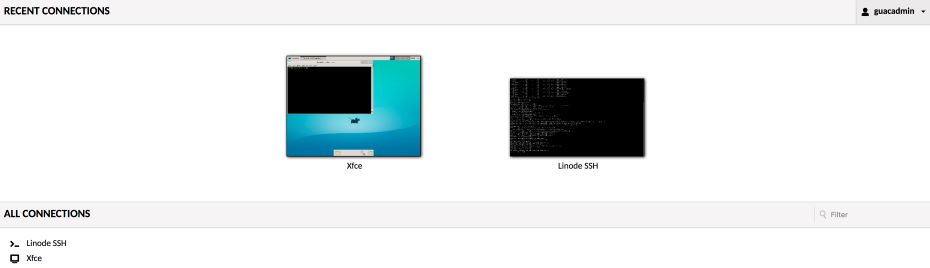
4.在右上角的下拉菜单中,点击 Home。新建的连接现在应该已经可以使用。
使用快捷键 CTRL + ALT + SHIFT 可以打开剪贴板、键盘/鼠标设置以及导航菜单。
5.点击浏览器的后退按钮,回到 Home 菜单。
6.可以连接至其他桌面,并且可在新的浏览器选项卡中同时连接多个远程桌面。
本指南旨在通过Docker简化安装过程,并演示如何使用Apache Guacamole快速连接至远程桌面。除此之外Apache Guacamole还提供了许多功能,如屏幕录制、Duo双重身份认证、SFTP文件传输等。Guacamole作为Apache的孵化项目,我们期待在不久的将来看到其进一步的发展。
参考文章

